Conversion Service in Docker
Learn how to run the Conversion Service in Docker.
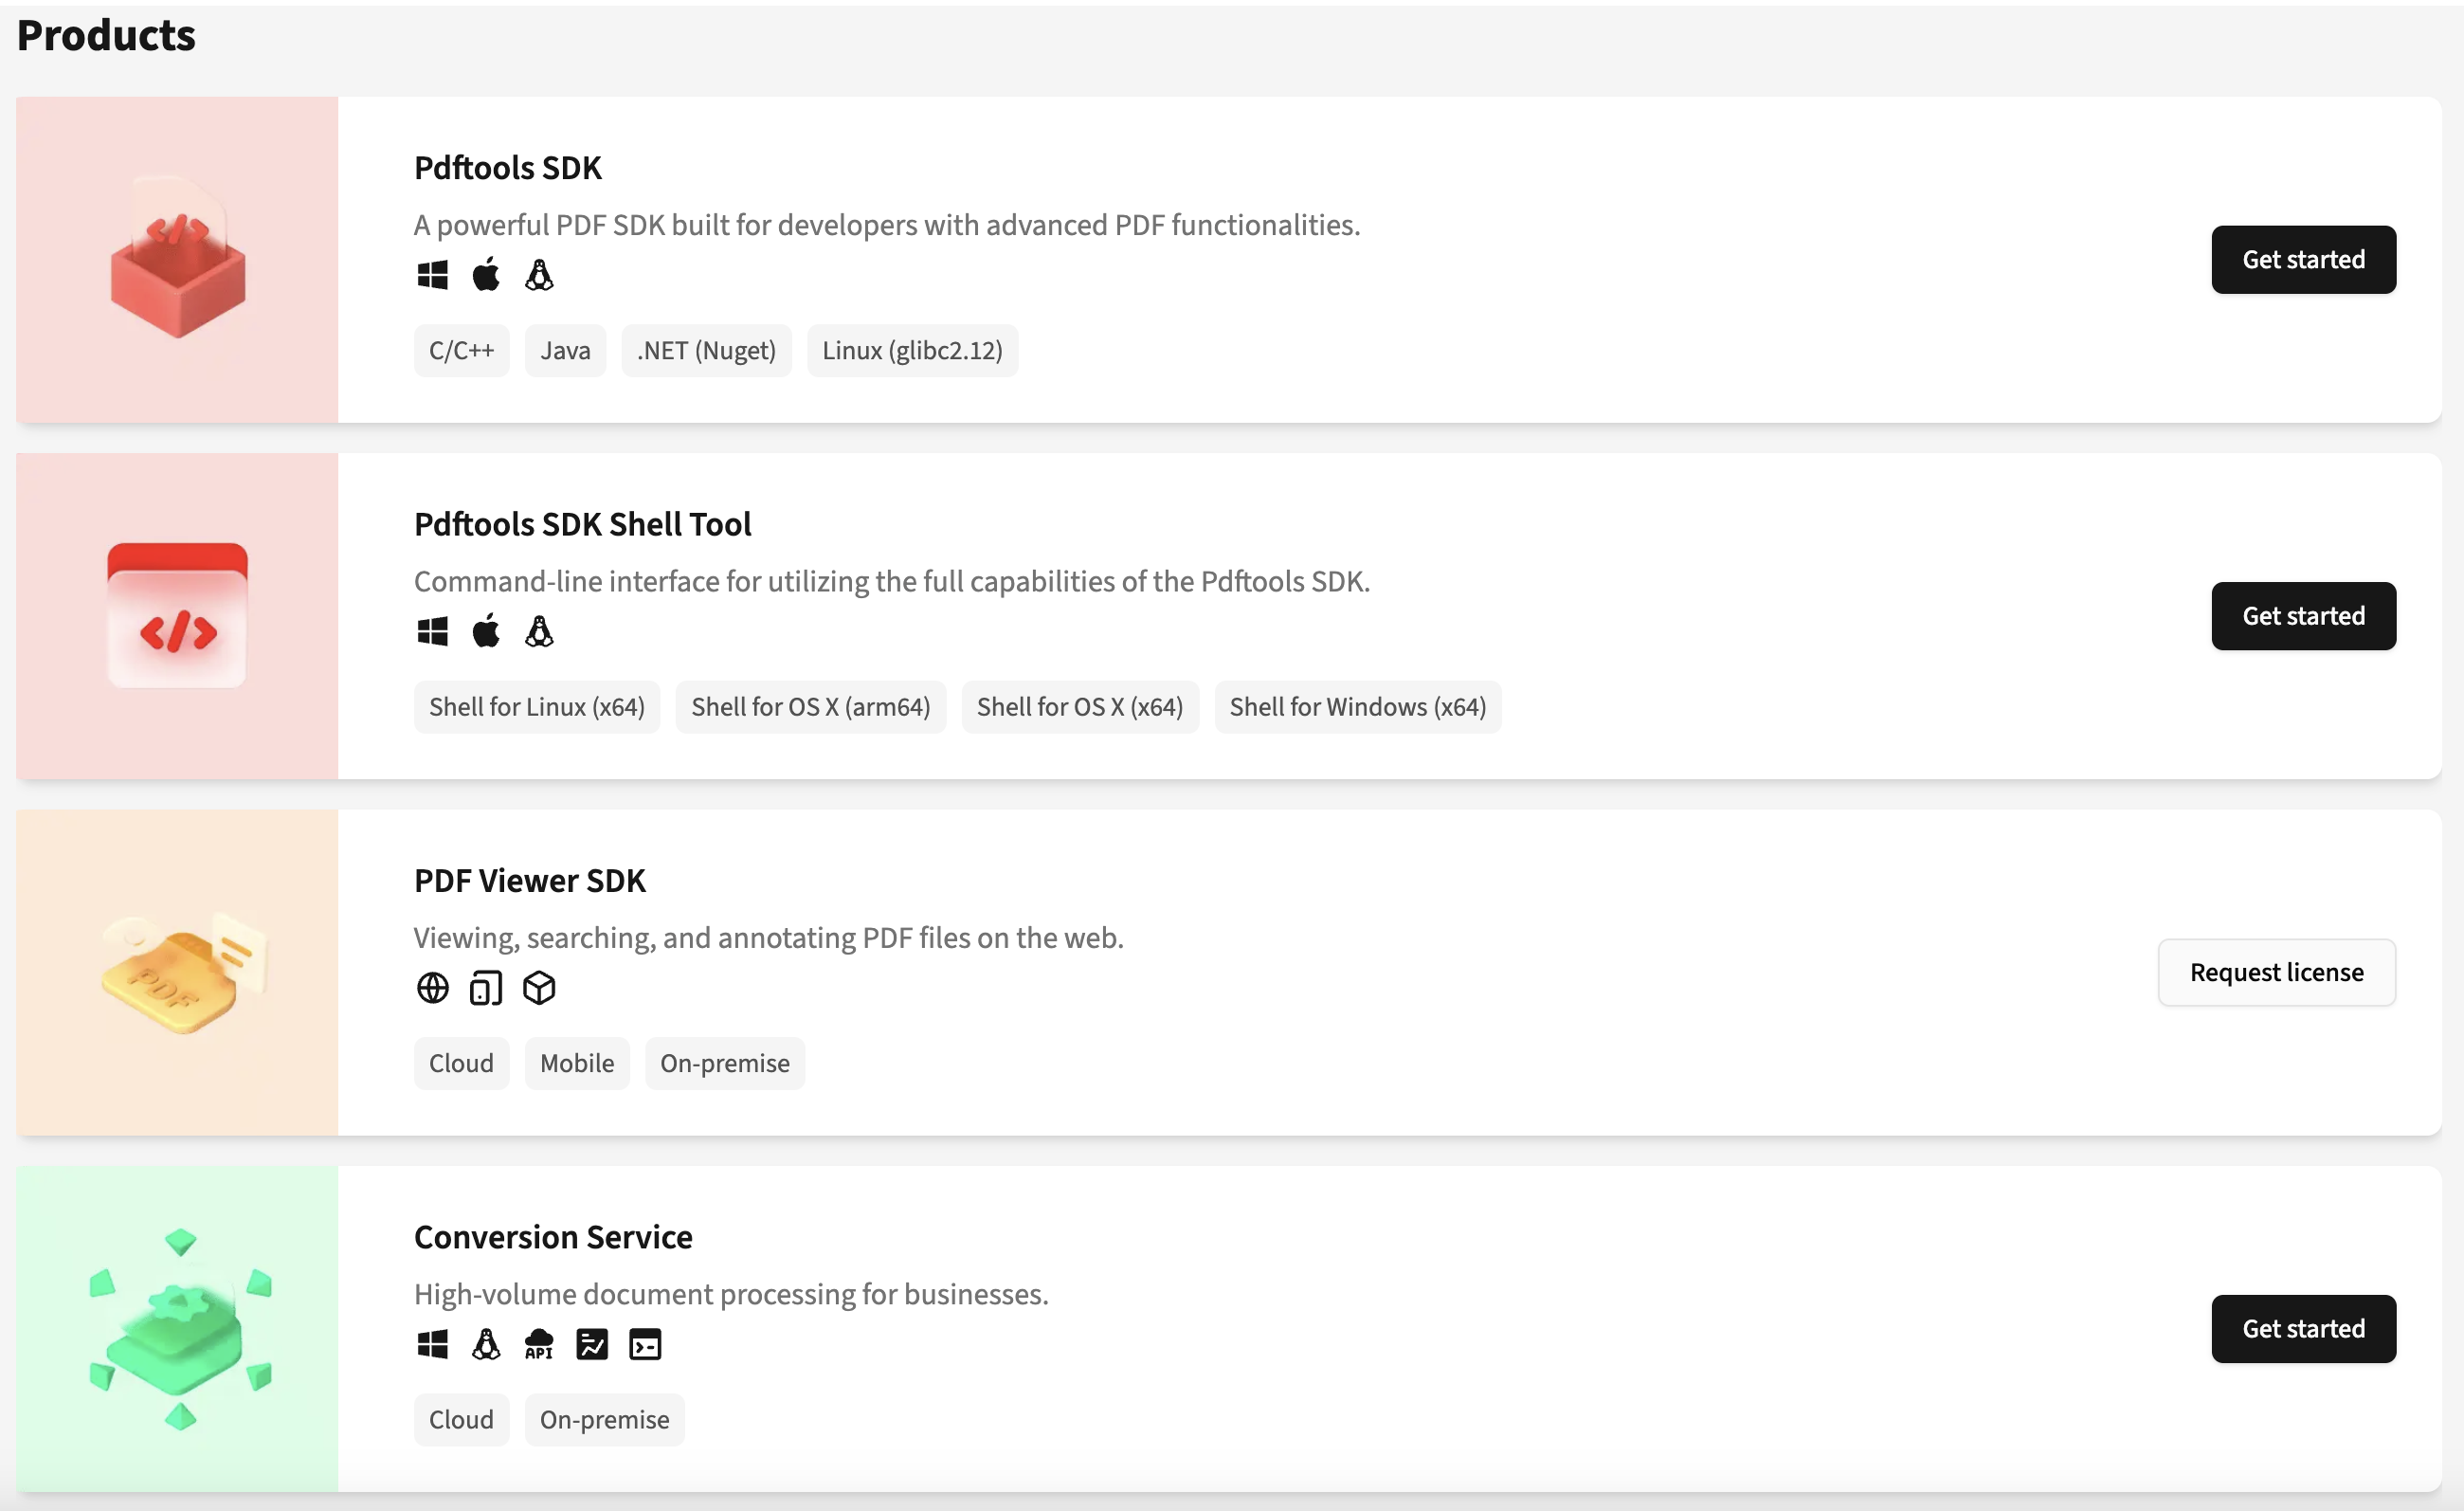
Get trial license
To try or fully use the Conversion Service, you must obtain a license key. To get the Conversion Service evaluation license key for free, follow these steps:
- Sign up or log in to the Pdftools Portal.
- On the Products page, next to the Conversion Service, click Get started or See product.
- Next to the Conversion Service Trial, click the Copy .

You now have a free trial license key. Its limitations are the following:
- The converted files have a watermark
- The license key is limited to 90 days.
The trial license key is valid for 90 days starting at UTC time. The Pdftools Portal indicates the validity period starting at 89 days (as the consumption of the first day already started). This period may slightly vary depending on your time zone relative to UTC.
Request full license
You can try the Conversion Service for free with a trial license key. In this section, you can learn how to request a full license key.
To request a full license key, follow these steps:
- Sign up or log in to the Pdftools Portal.
- On the Products page, next to the Conversion Service, click Request license.
- On the Contact us window, fill in the requested fields, and then click Submit.
Prerequisites
The following sections use examples running with Docker Compose:
- You have Docker Compose installed to run the Conversion Service in Docker.
- You have a Windows Server or Windows machine to export configuration files.
Installing Conversion Service on Windows 10 or 11 is possible, although we recommend using it only to export the configuration files. Pdftools provides official support for the Conversion Service for the Windows Server or Docker containers listed in the Compatible operating systems. If you run the Conversion Service on Windows 10 or Windows 11 for production purposes, you may not receive our full support.
Install Conversion Service on Windows
Install the Conversion Service on Windows Server or Windows 10 or 11 so you can export configuration files to your Docker instance with the following steps:
- Log in to the Pdftools Portal.
- On the Products page, next to the Conversion Service, click Get started or See product.
- In Product kits section, find the
ConversionService-VERSION_NUMBER.msipackage, and then click Download . The exact filename, for example,ConversionService-5.7.1.8691.msi, depends on the version you are installing.Ensure to download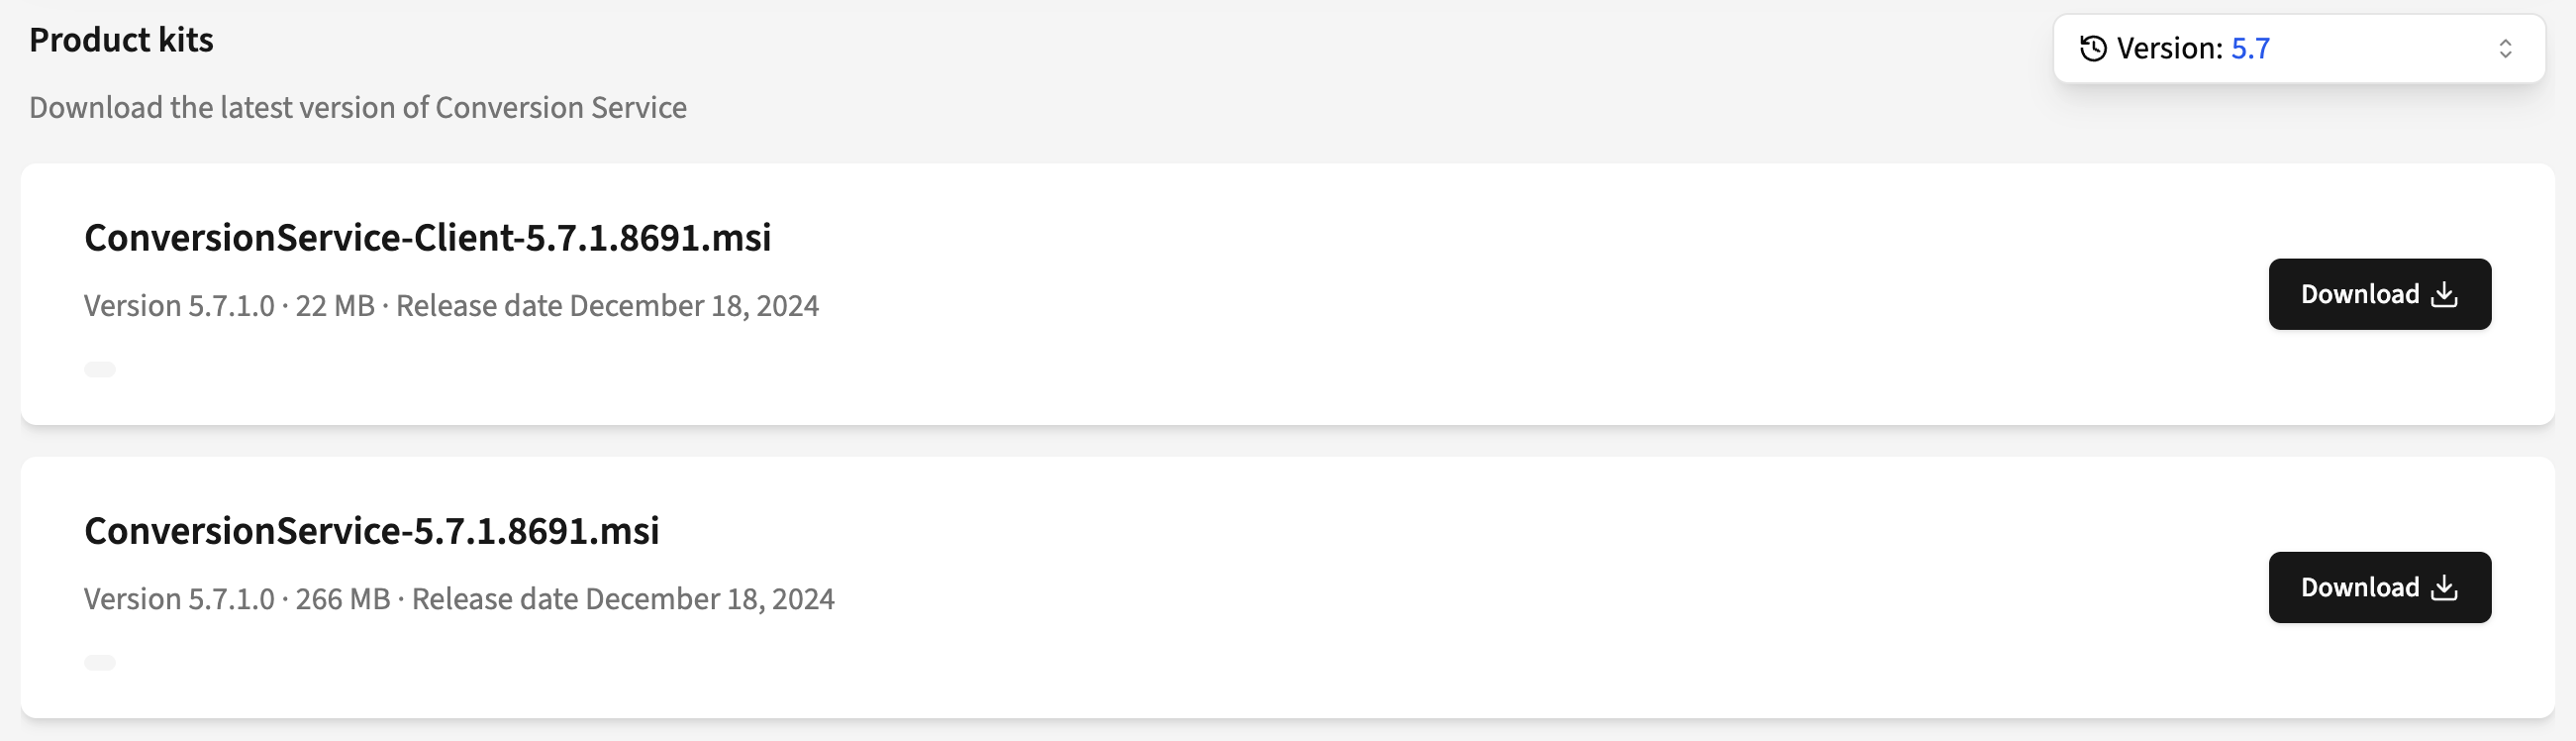
ConversionService-VERSION_NUMBER.msinotConversionService-Client-VERSION_NUMBER.msidue to the focus of this guide. - Open the
ConversionService-VERSION_NUMBER.msiinstaller and proceed with the guided installation.1 - In the My PDF Tools Portal, go to Licenses & Kits, and then click Conversion Service.
- In the License section, click the LICENSE button to reveal the license key, and then click COPY.
- Open Conversion Service Configurator, and then click the License tab.
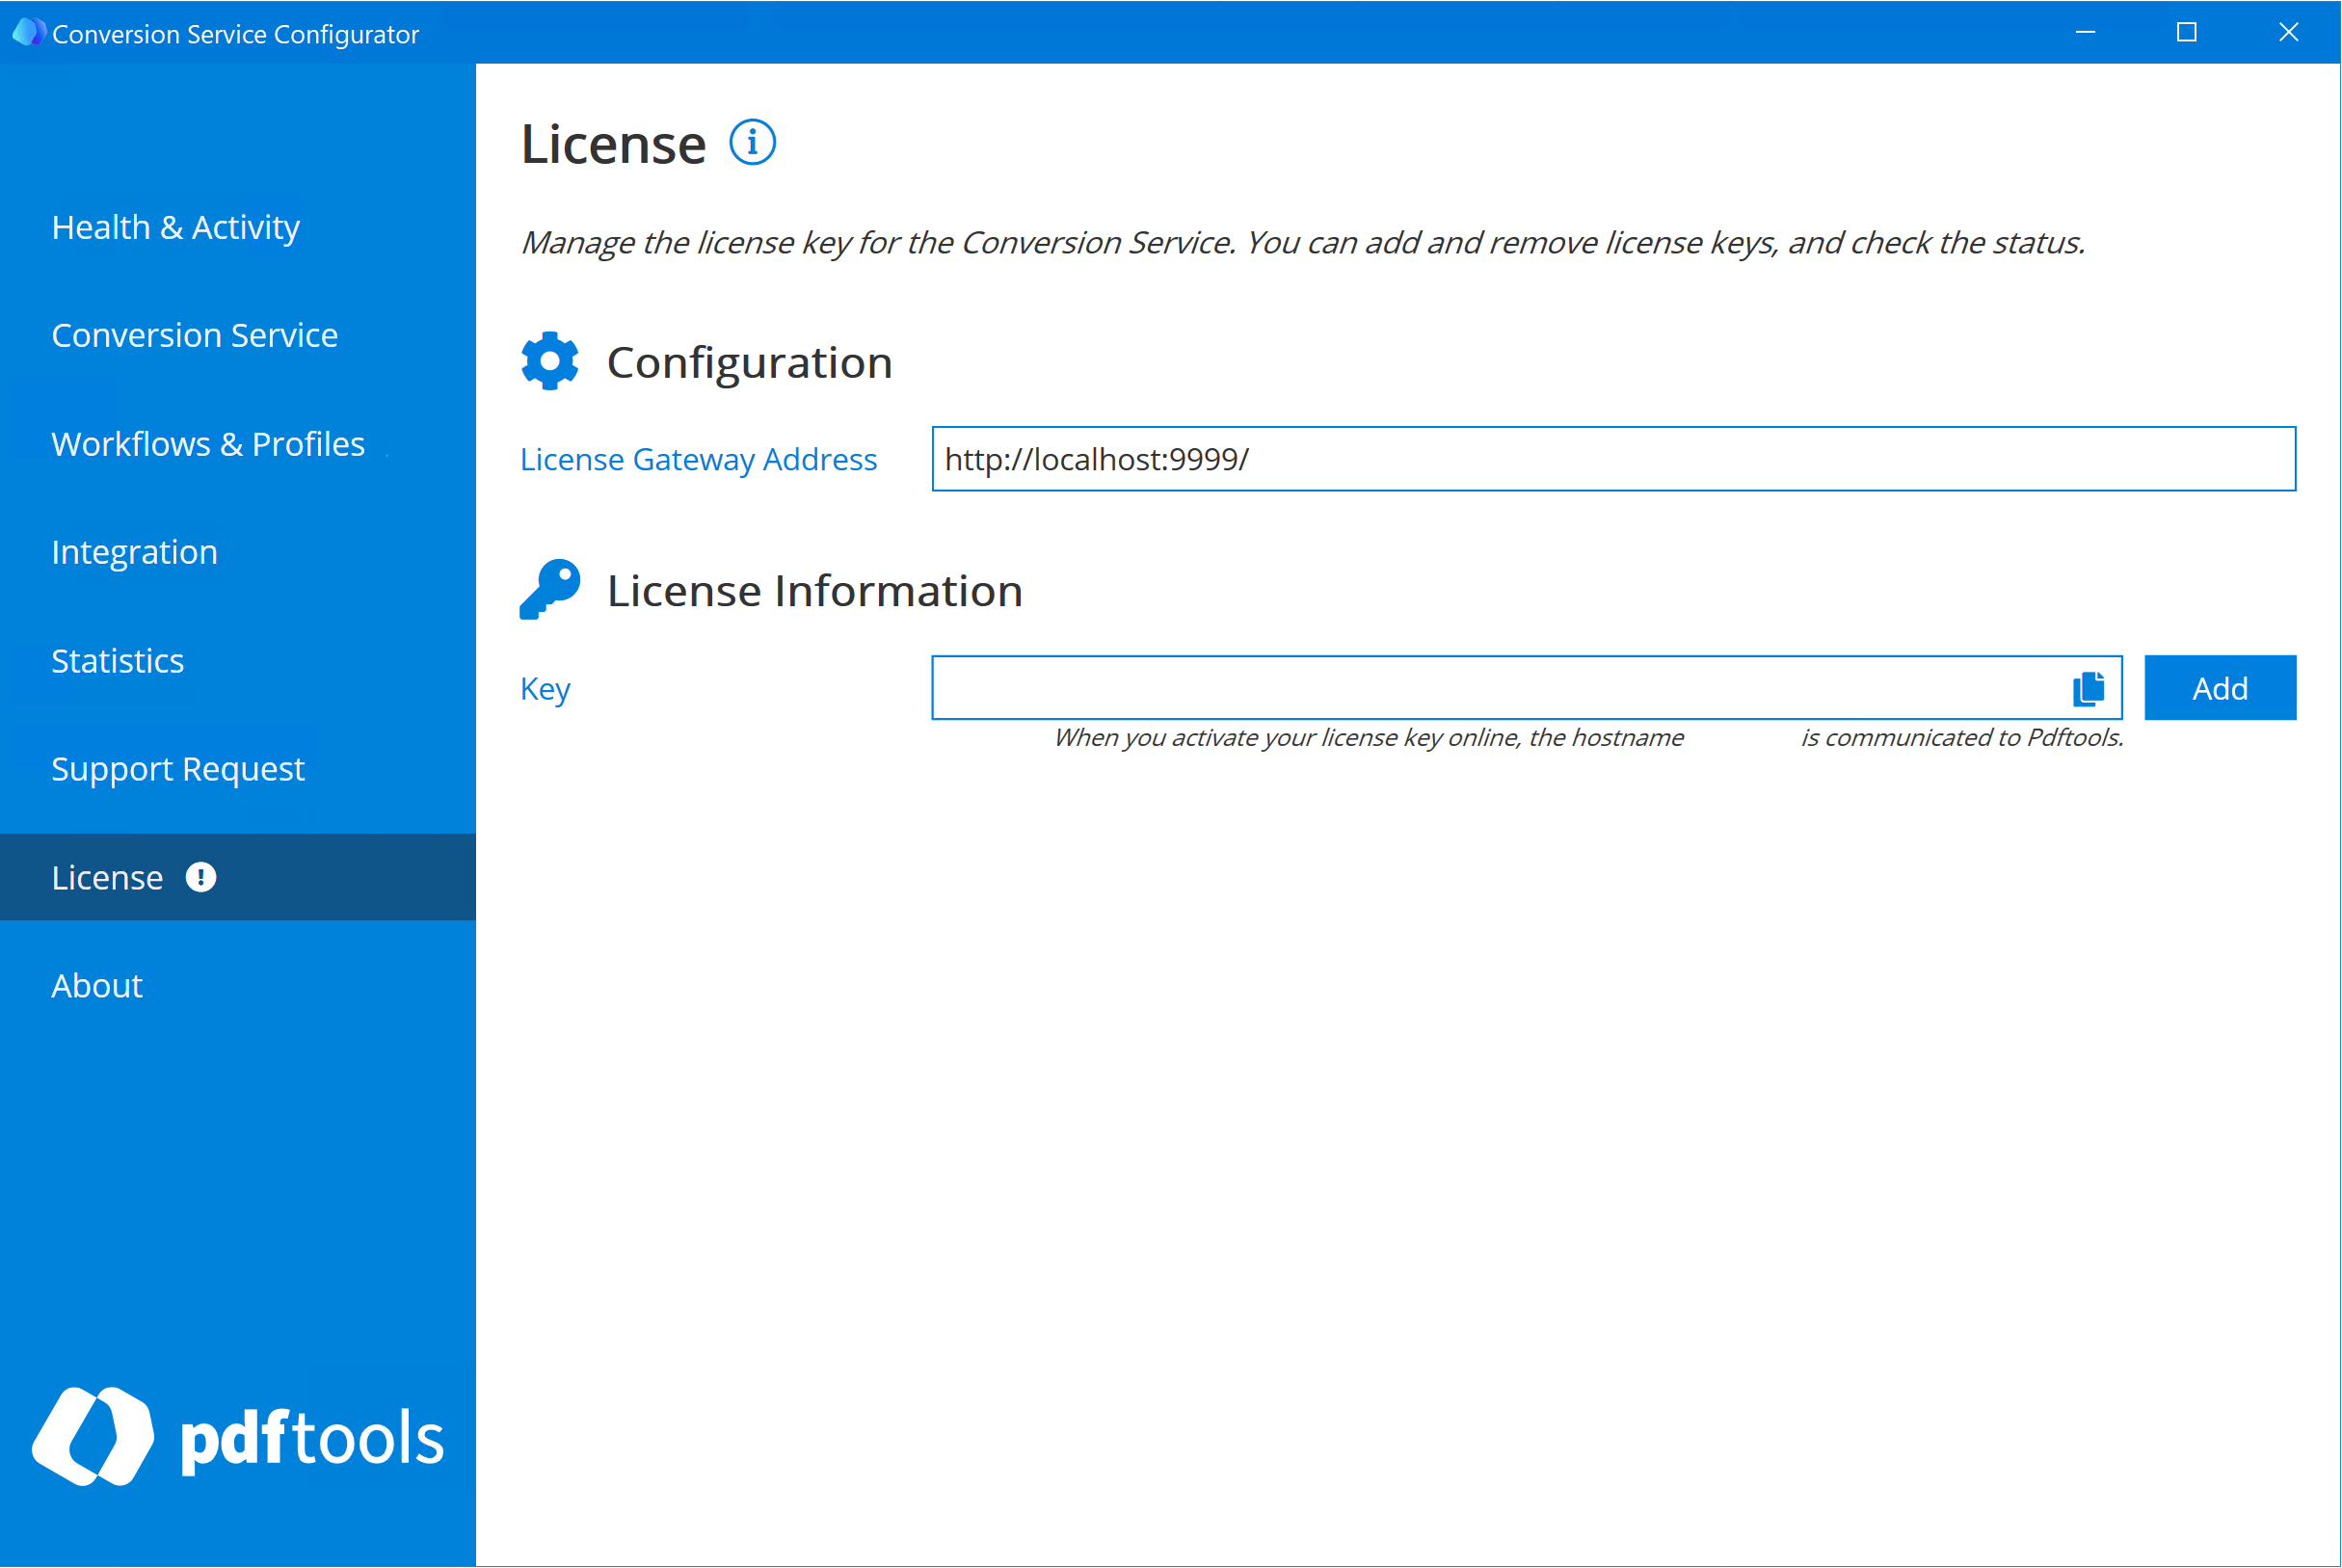
- Paste the license key into the Key field and click Add.
Installation details
The ConversionService-VERSION_NUMBER.msi installs the Conversion Service itself and provides the following applications that let you configure workflow profiles and more:
- Conversion Service Configurator
- PDF Client for Conversion Service
- Conversion Service shell client (CLI)
- Licensing Gateway Service
Run Conversion Service in Docker
To run the Conversion Service in a Docker container, follow these steps:
- Create a file named
docker-compose.yamland insert the following code:Replace the following:services:
conversion-service:
# Conversion Service image. Converts files to PDF format.
image: pdftoolsag/conversion-service:IMAGE_VERSION
environment:
# To activate the Conversion Service, pass the value of the license key.
LICENSEKEY: LICENSE_KEY_VALUE
LICENSINGSERVICE: http://LGS_IP_ADDRESS:9999
ports:
# Exposes port 13033 for external communication.
- "13033:13033"IMAGE_VERSION: The Conversion Service version number. For example:6.0.0,6.0,6LICENSE_KEY_VALUE: Pass the license key value.LGS_IP_ADDRESS: The IP address of the machine with the Licensing Gateway Service (LGS). The LGS is installed as part of the Conversion Service installer and can also be installed separately. Use9999as the recommended port address.
- Optional: If you run the Conversion Service Docker instance within a machine where you also run the Conversion Service (for Windows or Windows Server), you need to free up one of the used ports. Go to the Conversion Service Configurator, open the Conversion Service tab and then click Stop. This action frees port 13033 for the Docker instance.
- In the directory where you created the
docker-compose.yaml, run the following command:docker compose up -d
The LICENSINGSERVICE parameter configures the Licensing Gateway Service (LGS) endpoint. The LGS sends your hostname and the number of processed pages (license usage data). No other data about the documents you processed is sent. In the demonstrated configuration, the Windows machine sends usage data of your Docker container.
You can install and configure the LGS in a Docker container or any other machine and let it send license usage data for an unlimited number of Conversion Service instances with just one license key.
For more details about the LGS, review the following pages:
Convert file
Learn how to convert files using the Conversion Service Docker instance through the PDF Client for Conversion Service. Convert a PDF file to PDF/A using the default configuration:
- In the PDF Client for Conversion Service, drag a PDF file to the Input box.
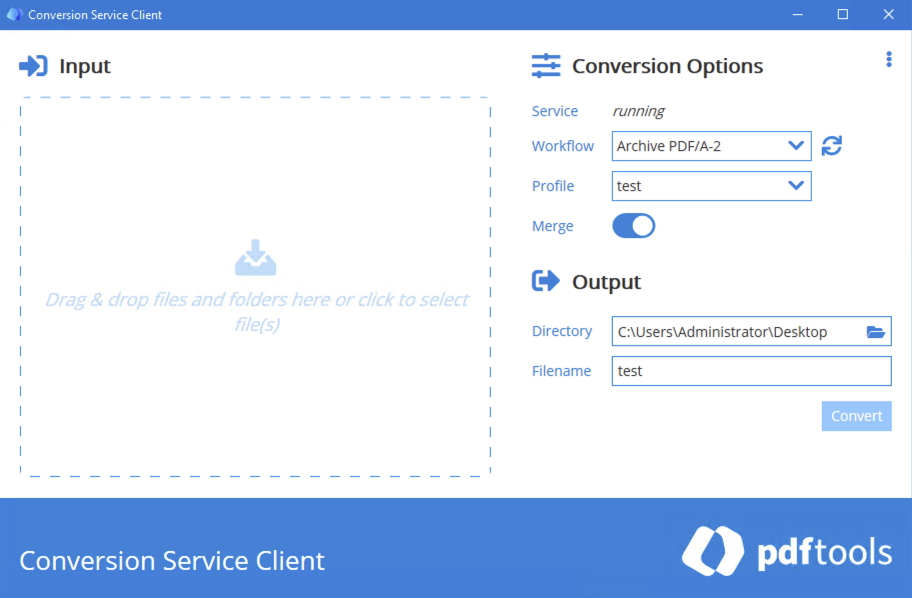
- Optional: If you are running the Docker instance on a machine other than the one where you installed Conversion Service on Windows, click the vertical three-dot menu, click Settings, add the IP address of your Docker instance, and then click Apply.
- In the Profile drop-down list, select the Default profile.
- Click Convert.
In the PDF Client for Conversion Service, you can select various workflows and profiles to choose specific conversion types. You can also change the filename of the output file.
Configure and export a profile
Configure a custom profile to add a QR code to converted documents and export the configuration to your Docker container:
-
In your Windows machine, open the Conversion Service Configurator, go to Workflows & Profiles.
-
Next to Archive PDF/A-2, click Add.
-
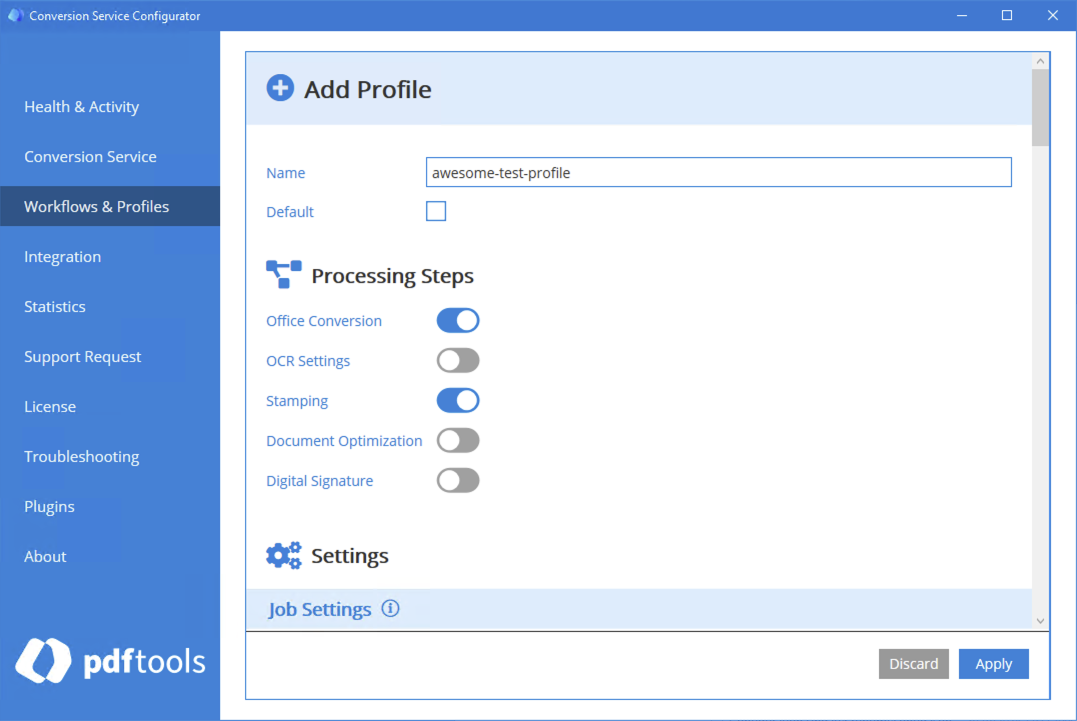
Create a name for the new profile. For example: awesome-test-profile
-
In the Processing Steps section, enable the Stamp and Annotation toggle.
-
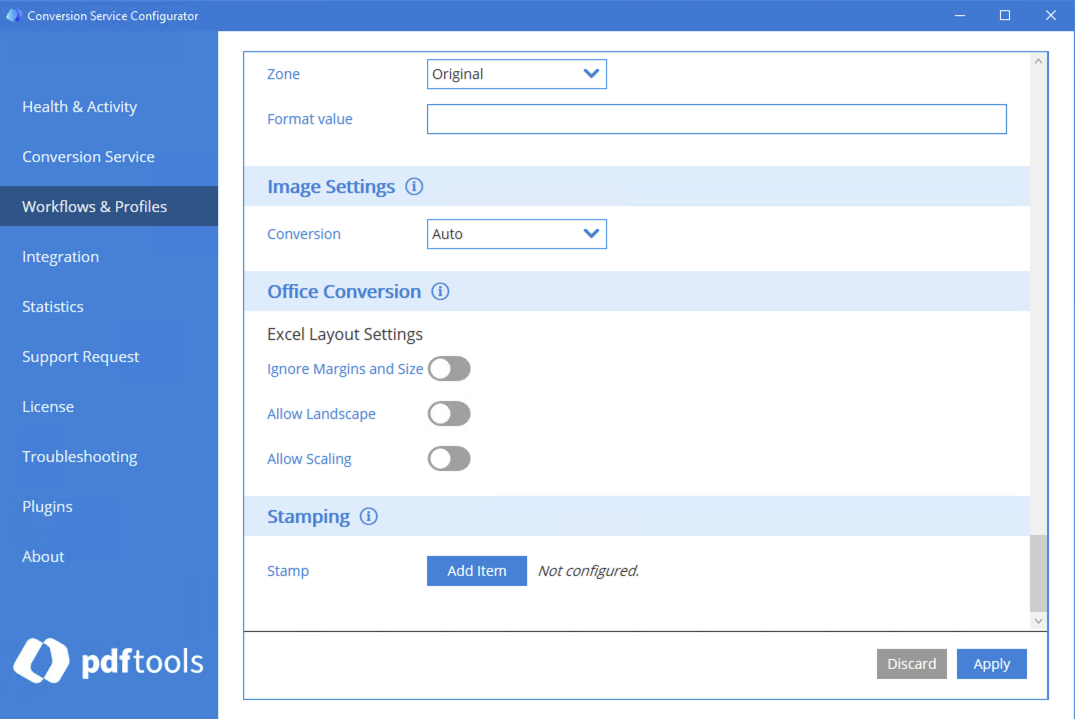
Scroll down to the Stamp and Annotation section, and then click Add item.
-
Click Barcode Stamp, and then click Next.
-
In the Type field, select QR.
-
In the Value field, enter any text you like (it can be a website link). For example: Hello world
-
Scroll down to the Layout section, and set the Width and Height. For example, set it to 3 cm.
-
Optional: To display the stamp in the upper right corner of the PDF file, edit other parameters in the Layout section as follows:
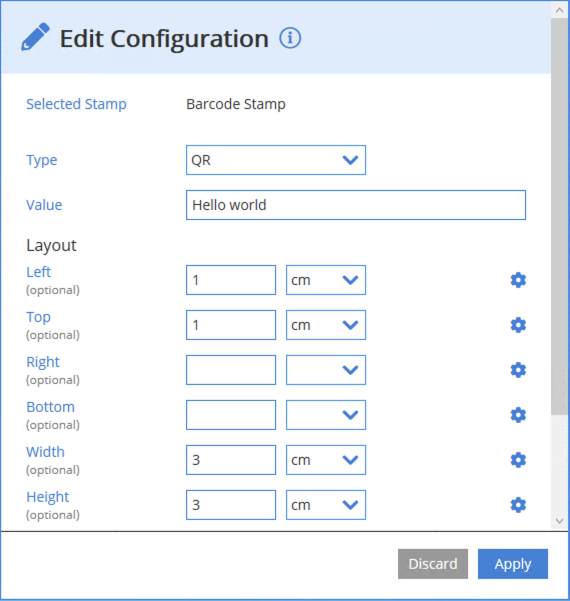
If you don't specify any values in the Layout section, the QR code is displayed in the center of the page.
-
Click Apply, then click Apply in the Configurator again.
-
In the Changes detected dialog box, click Save & Restart Service.
-
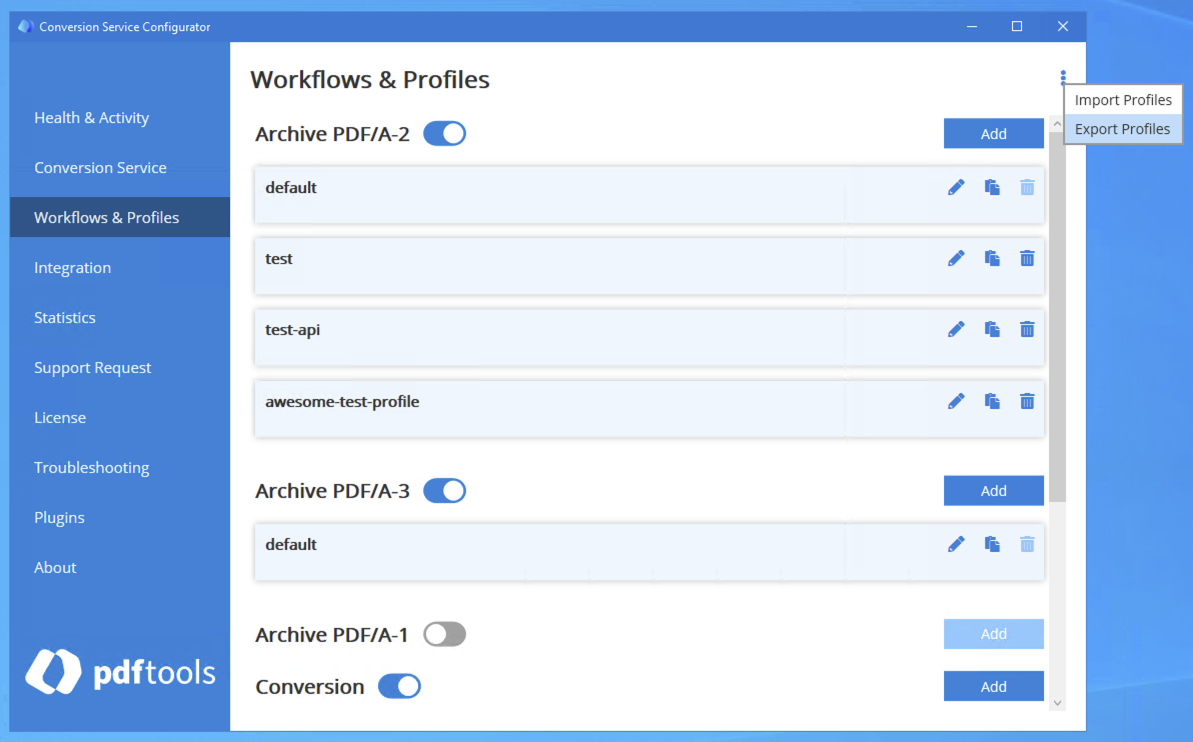
In the Workflows & Profiles page, click the vertical three dots menu, and then click Export Profiles.
-
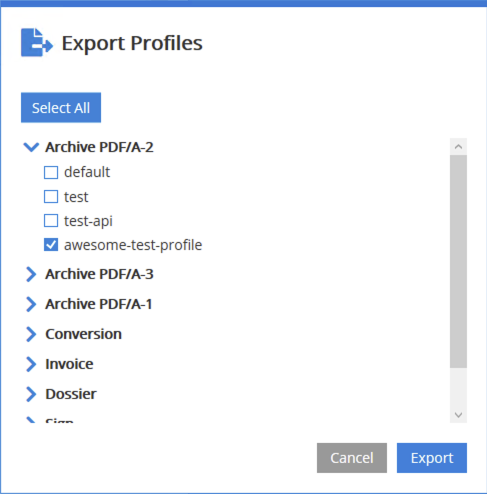
Select the name of the profile you want to export, for example: awesome-test-profile, or click Select All to export all profiles.
-
Click Export, and then select the file destination.
-
Edit the
docker-compose.yamlto mount the configuration file from your Windows machine:services:
conversion-service:
# Conversion Service image. Converts files to PDF format.
image: pdftoolsag/conversion-service:IMAGE_VERSION
environment:
# To activate the Conversion Service, pass the value of the license key.
LICENSEKEY: LICENSE_KEY_VALUE
LICENSINGSERVICE: http://LGS_IP_ADDRESS:9999
IMPORT_PROFILES: /etc/convsrv/ProfileExport-5.7.2.export
ports:
# Exposes port 13033 for external communication.
- "13033:13033"
volumes:
- C:/Users/john-doe/Desktop/ProfileExport-5.7.2.export:/etc/convsrv/ProfileExport-5.7.2.exportReplace the following:
IMAGE_VERSION: The Conversion Service version number. For example:6.0.0,6.0,6LICENSE_KEY_VALUE: Pass the license key value.LGS_IP_ADDRESS: The IP address of the machine with the Licensing Gateway Service (LGS). The LGS is installed as part of the Conversion Service installer and can also be installed separately. Use9999as the recommended port address.C:/Users/john-doe/Desktop/ProfileExport-5.7.2.export: The file path and the name of the exported profile on Windows.ProfileExport-5.7.2.export: Filename of your export file.
-
In the directory where you created the
docker-compose.yaml, run the following command:docker compose up
If you use text stamp or text annotation rather than the demonstrated QR code, ensure to install the selected font family in the Docker container. For example, the Configurator selects Calibri fonts for text stamps by default, but you must install the Calibri font family to finish the processing successfully.
Convert file using custom profile
Learn how to apply a profile created in the section Configure and export a profile. Convert a PDF file to PDF/A using your custom profile configuration:
- In the PDF Client for Conversion Service, drag a PDF file to the Input box.
- In the Profile drop-down list, select a created custom profile. For example: awesome-test-profile
- Optional: If you are running the Docker instance on a machine other than the one where you installed Conversion Service on Windows, click the vertical three-dot menu, click Settings, add the IP address of your Docker instance, and then click Apply.
- Click Convert.
Configure Microsoft Office file conversion
Learn how to configure Microsoft Office file conversion in Docker with the Microsoft Office for Web.
To enable Microsoft Office file conversion in Docker, you need:
- Account for Microsoft Office for Web.
- Conversion Service profile with Microsoft Office conversion enabled. Most profiles have this conversion enabled, review Configure and export a profile.
-
Edit the
docker-compose.yamlas follows:volumes:
vol-conversion-srv-app-data: {}
services:
conversion-service:
# Conversion Service image. Converts files to PDF format.
image: pdftoolsag/conversion-service:IMAGE_VERSION
environment:
# To activate the license, pass the value of the license key.
LICENSEKEY: LICENSE_KEY_VALUE
LICENSINGSERVICE: http://LGS_IP_ADDRESS:9999
IMPORT_PROFILES: /etc/convsrv/ProfileExport-5.7.2.export
SERVICE__OFFICE__TYPE: OfficeWebService
SERVICE__OFFICE__USERNAME: YOUR_OFFICE_USERNAME
ports:
# Exposes port 13033 for external communication.
- "13033:13033"
volumes:
- vol-conversion-srv-app-data:/etc/convsrv
- C:/Users/john-doe/Desktop/ProfileExport-5.7.2.export:/etc/convsrv/ProfileExport-5.7.2.exportReplace the following:
IMAGE_VERSION: The Conversion Service version number. For example:6.0.0,6.0,6LICENSE_KEY_VALUE: Pass the license key value.LGS_IP_ADDRESS: The IP address of the machine with the Licensing Gateway Service (LGS). The LGS is installed as part of the Conversion Service installer and can also be installed separately. Use9999as the recommended port address.YOUR_OFFICE_USERNAME: Username of the account you want to use for Microsoft Office conversion.C:/Users/john-doe/Desktop/ProfileExport-5.7.2.export: The file path and the name of the exported profile on Windows.ProfileExport-5.7.2.export: Filename of your export file.
-
In the directory where the
docker-compose.yamlis located, run the following command:docker compose up -d -
In the same directory, run:
docker ps -
Copy the container ID where you run the Conversion Service. This ID can have a form similar to:
09d8dcaiel23noteThe
docker psalso displays the container name. Every time you run thedocker compose up -d, a new ID is generated, and you need to copy this ID again. -
Grant the Conversion Service user access to the volume data inside the container by running the following command:
docker exec -u root CONTAINER_ID_OR_NAME chown convsrv:convsrv /etc/convsrv/- Replace
CONTAINER_ID_OR_NAMEwith your container's name or ID.
- Replace
-
Run the following command to configure the Microsoft Office user:
docker exec CONTAINER_ID_OR_NAME ./bin/csconfig office webinit- Replace
CONTAINER_ID_OR_NAMEwith your container's name or ID.
The output is a message with the next steps specified. Review the following example:

- Replace
-
Open the provided link, and then enter the code.
-
Log in with the username that you added as the value of the
SERVICE__OFFICE__USERNAMEenvironment variable in the first step of this configuration. -
In the PDF Client for Conversion Service, drag a Microsoft Office file to the Input box.
-
In the Profile drop-down list, select a profile with Microsoft Office enabled. For example: awesome-test-profile
-
Optional: If you are running the Docker instance on a machine other than the one where you installed Conversion Service on Windows, click the vertical three-dot menu, click Settings, add the IP address of your Docker instance, and then click Apply.
-
Click Convert.
Next steps
For more details about Docker configuration, see Set up the service in Docker page.
You learned how to run the Conversion Service in Docker, convert a file using default profile, create a custom profile, export it, and convert a file using custom profile. Review the following documentation for more details:
- Set up the service depending on your installation.
- Adapt the default profile or create a new profile for a workflow.
- Create a new workflow
There are several ways you can integrate the Conversion Service into your system:
Use PDF/A-2 instead of PDF/A-1 in Docker
The PDF/A-2 is based on a newer version of the PDF standard than PDF/A-1, more PDF features are allowed such as transparency, layers, embedded files, and a less restrictive internal file structure. For these reasons, achieve fewer conversion errors and better conversion quality with the Archive PDF/A-2 workflow. Particularly, if you use the Conversion Service in a Docker container where document content rasterization is unavailable, use PDF/A-2 workflow instead to avoid visual differences, removed transparency, or other potential issues. For more information, review Features and limitations.
Footnotes
-
During the installation on the Windows Server or Windows machine, the installer automatically prompts you to install the following dependencies:
↩